The Traditional Bluegrass Microphone Technique: Part 2
This article of mine appeared in the Northern Bluegrass Circle Music Society's December 2009 newsletter. Part 3 of of my two part article is now in the works!
----
The Traditional Bluegrass Microphone Technique. Part 2: How to Work the Mike
In Part 1, we discussed the basic characteristics of mikes. In this instalment, we talk about how to use a single mike. The single mike technique can work quite well, but it can also work really badly. The quality of the acoustic space, the mike and the sound system are important factors, and the sound person only has control of the overall tone and volume. Most of the success of the technique depends on the musicians' skill in working the mike.
Setup
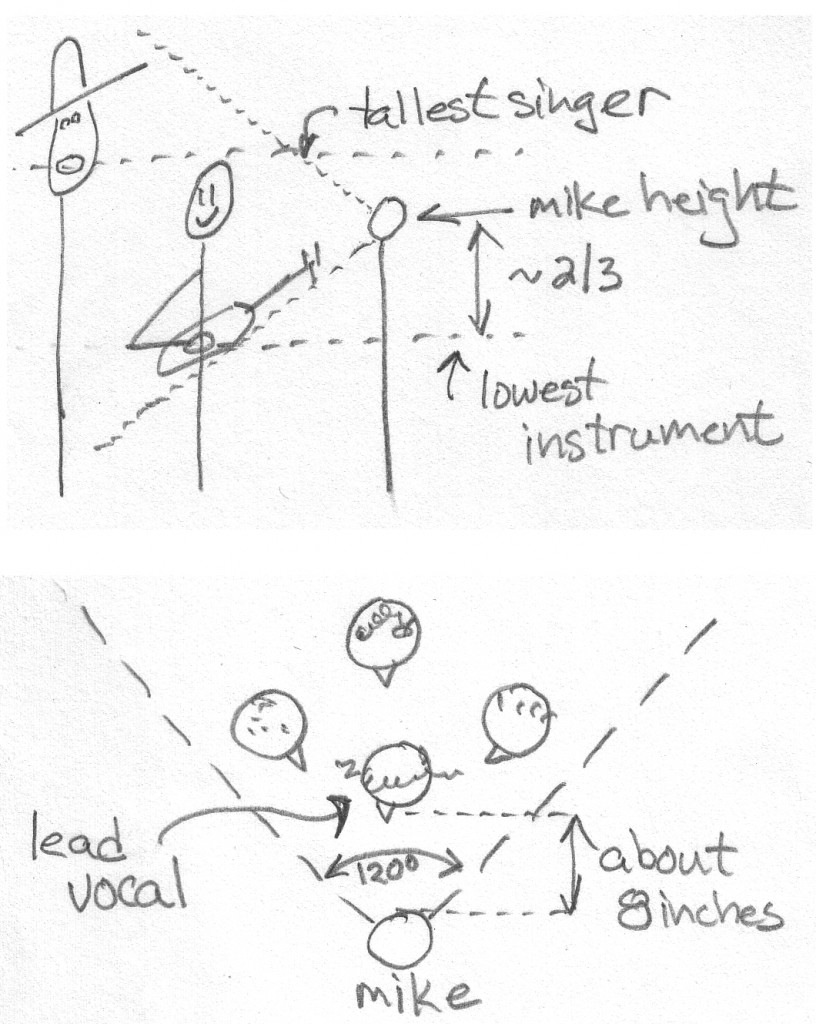
The mike should be placed downstage (towards the audience) to minimize pick-up of echoes off the walls behind and to the sides of the mike. You may have to back it up a little if you get some feedback from the main speakers. Monitor wedges are occasionally used, but not very loud due to feedback. As we discussed in Part 1, proximity to the mike affects the loudness and tonal quality, so the mike needs to be set at the correct height for the band. Consider that the one mike has to pick up the vocals (mouth height) and the instruments (mostly belly height, except for fiddle), so take a look at the relative heights of everybody and their instruments and find a reasonable compromise that covers everything roughly equally. Since vocals are very important in bluegrass, the mike will be a little closer to the mouths than the instruments. The mike can be set a little lower than chin height as that will pick up a good blend of vocals and instruments, and will allow a good audience view of musicians' faces. About two-thirds of the way up, between the lowest instrument and the tallest singer's mouth is a good starting point, but you can experiment to find the best height. The mike will pick up sound from below your mouth, so you don't have to bend over into it. The mike picks up approximately a 120 degree zone on one side of the mike, so cluster your band in a tight arc on the pickup side of the mike.

Fig. 1. Mike height and player placement.
Voices: Know Your Own Volume
There are louder singers, quieter singers, voices that project well, some that don't. Each singer's proximity to the mike will have to take that into account. The lead vocalist should generally be the closest and in the centre – 8 to 12 inches from the mike. Backup vocals should be off to the sides and a little further away, and louder singers will have to back off a little. Some people may have to lean in a little. If you have a quiet voice, get in closer, but not too close - six inches should be about the closest you ever get. During a quiet passage, you should get closer to make sure the words are intelligible. When you belt it out, you can back off a lot and still get the effect without knocking over the first few rows of the audience. Connect the dynamics of the song to the distance from the mike. During your band's vocal practice, it's a good idea to include mike technique practice.
Instruments: Know Your Own Volume
The same idea applies to the instruments. In general, instruments playing rhythm can be further away because they're providing a supporting role, and an instrumental break requires that the instrument be closer to the mike. Usually the acoustic guitar is the quietest instrument, but it depends on your playing style. You can make that Martin project pretty loud (ask your Bluegrass Workshop instructor how), but generally the guitar needs to be quite a lot closer than most instruments, and you may have noticed how the other players in bands usually quiet right down when the guitar takes a break. The main difficulty with the guitar is that getting in close can completely change the tone so it's good to know how different regions of the instrument sound different in front of a mike. If you put the sound hole right in front of the mike, it can sound too boomy with poor definition. Move the guitar over so that the 12th fret on the fingerboard is right in front, and the sound gets much tinnier. Somewhere in between should be optimal so experiment with your own guitar to find the best sounding mike-guitar orientation.
Mandolins generally pick up fairly well even at a distance and they cut through because of their tone. When players do the chop, they can be quite a ways back, but they do need to get a little closer to the mike for the breaks. The banjo is often the loudest instrument, so it can be further away (outside in the parking lot is good).
Due to its size, the standup bass usually ends up the furthest away, and often the bottom end of the instrument sounds fairly weak through the sound system. However if it gets closer, there may be too much string slap. Many top bluegrass bands (such as the Del McCoury Band) will compensate for this by plugging the bass into a separate channel using a direct input (DI) box (oops, did I say "plug-in" in a bluegrass newsletter??).
Side Mikes
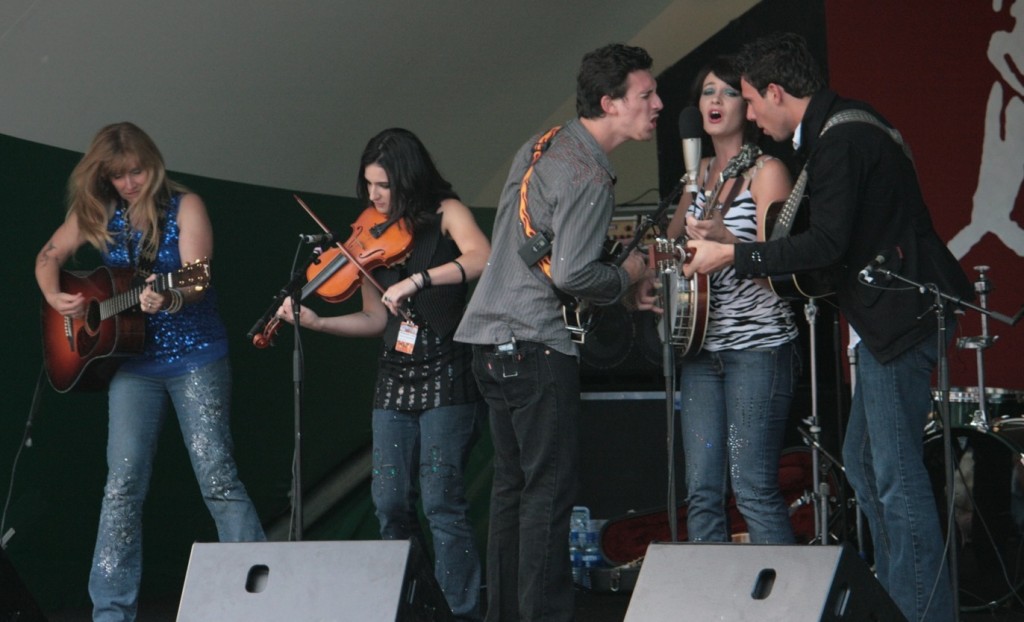
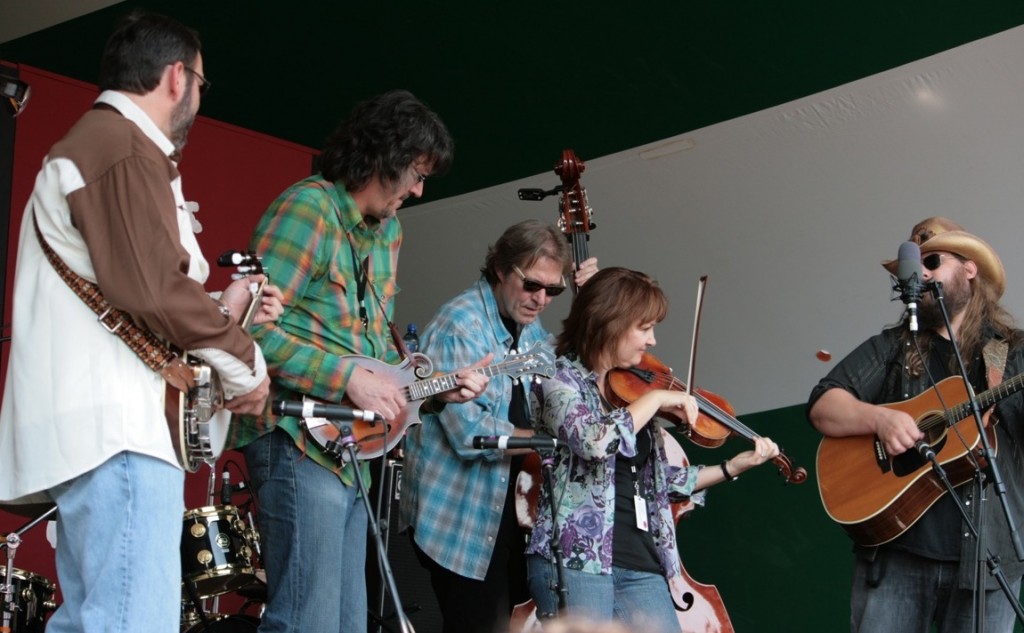
You may have noticed a lot of bands use a side mike or two. The placement of one or two small hyper-cardioid (very directional) mikes can make playing instrumental breaks and incidental fills more convenient. These mikes can be placed at more appropriate heights for the instruments. Both Cherryholmes and The Steeldrivers made great use of side mikes at the Edmonton Folk Music Festival this past summer.

Fig. 2. Cherryholmes. Single mike (looks like a Shure KSM44) in the centre and two side mikes for instrumental breaks and fills. (Photo by Kevin Jacobson)

Fig. 3. The Steeldrivers. Single mike (far right, in front of guitar player's face). IMO, the mike was a bit too high - the fiddle player had to stand on tippy-toes to sing into it. Shure SM57s being used as side mikes. SM57s are cheap dynamic mikes, but surprisingly good. (Photo by Kevin Jacobson)
Practice and Experiment
Just like anything else, it's a great idea to practice mike technique with your band. If you can, set up a mike and a simple recording system at home and try it out. Try it by yourself, try it with your whole band. Try it vocals only, instruments only, and then all together. When you play somewhere, have someone in the audience listen carefully so they can provide some constructive advice. Search for Del McCoury videos on youtube and watch some pro-level microphone work. In particular, check out their performance of Nashville Cats in Austin (below) - a great example of mike technique. Watch how close they get for lead vocals, backing vocals, and instrumental fills and breaks.
Make a Show of It
The most important thing is to sound good, so at the very least your band needs to practice moving around the mike and each other to accommodate what's happening in the song. The lead vocalist needs to move aside for the instrumental breaks, instrumentalists and backup vocalists move in and out as needed. So practice this for every song you do. Once you get skilled, you can choreograph an interesting show with mike technique. Have people zip around the mike to new positions, shuffle people around. Fool around and have fun!
by Kevin Jacobson (www.cavemusic.ca)